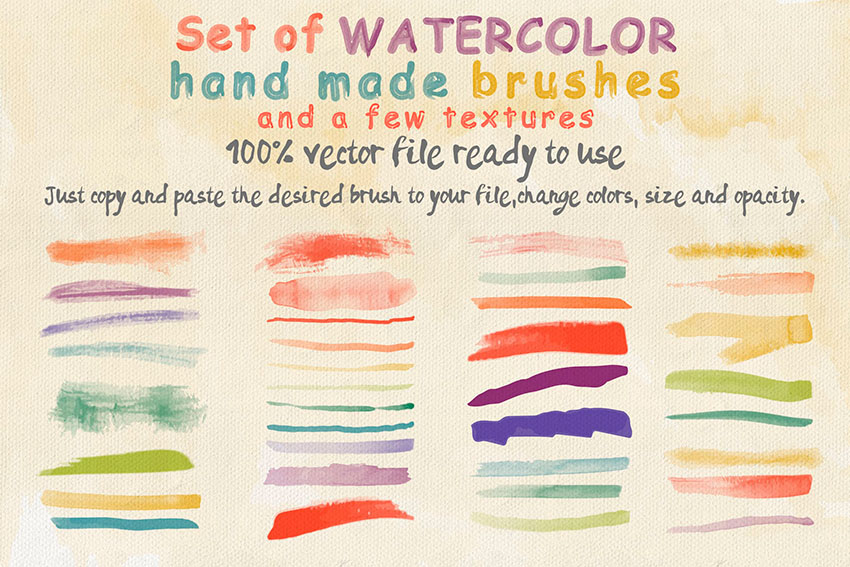
What You’ll Learn in This Watercolor Brush Illustrator Tutorial
- How to use the default watercolor brushes found in Adobe Illustrator
- How to create your own custom watercolor brushes using a Bristle Brush
- How to create a custom watercolor brush using a scanned image
- How to create a custom watercolor brush using the Image Trace function
1. How to Use the Default Watercolor Brushes Found in Adobe Illustrator
By default, Illustrator comes with its own pack of watercolor Ai brushes, which can be accessed from within the Brushes panel.
Step 1
Bring up the Brushes panel, and then click on the Brush Libraries Menu located in the bottom-left corner, and navigate to Artistic > Artistic_Watercolor.

Step 2
A new window should pop up, giving you the option of choosing from 12 different available watercolor Illustrator brushes.

Step 3
To use any of the watercolor Ai brushes, simply select it and then grab the Paintbrush Tool (B) and draw as you would normally do, using either the mouse or a graphics tablet.

Step 4
You can easily adjust the brush’s color by changing its Stroke value as you would do with any other shape.

Step 5
You can also adjust the thickness of a brush or brushstroke by increasing or decreasing its Stroke’s Weight, depending on what you’re trying to achieve.

2. How to Create Your Own Custom Watercolor Brushes Using a Bristle Brush
We covered how to use a watercolor brush from the included kit, although they’re a little basic. What if you wanted to create one of your own—one that would be a little bit more attractive, let’s say?
Well, you can, and I’m going to show you three different methods to create watercolor Illustrator brushes.
According to Adobe, a Bristle Brush allows you to create “natural and fluid brush strokes that simulate the effects of painting with real brushes and media such as watercolor”.
By default, Illustrator comes with its own set of bristle brushes, which you can easily access by opening up the Brushes panel, and then clicking on the Brush Libraries Menu.
A new dropdown list will appear, giving you eight predefined brush categories, the fourth one being Bristle Brush.

Once you open up the Bristle Brush Library, a new window will appear, giving you a total of 14 different assets that you can choose from, each one producing a completely different result.

But what if we wanted to create our own custom bristle brush? Well, you can actually create your very own brush from scratch, as we are going to see in the following moments.
Step 1
To create a custom watercolor paintbrush, start by opening up the Brushes panel again, and then simply clicking on the New Brush button found in the bottom-right corner.

Step 2
A new window prompt will appear, asking you what type of brush you want to create. We’re going to make sure we select Bristle Brush and then click on OK.

Step 3
As soon as you hit OK, Illustrator will bring up the Bristle Brush Options window, where you’ll be able to give your new brush a custom name and then fine-tune its different settings. For now, let’s name it so that we can easily identify it later on.

Step 4
If we move down, we’ll see an option called Shape, which lets us choose from ten different brush head types, giving us a quick preview so that we know what to expect.
For this current example, I’m going to go with a Round Point one, but feel free to try something different if you feel like experimenting on your own.

Step 5
We then have Size, which as the name suggests allows us to control the width or diameter of our brush. Personally, I’m going to set it to 6 mm, which should make it easier to see what the other options do.
TIP
If you take a close look above the current option, you’ll notice that you have a little preview window, which will show you exactly how your settings will affect the final brush. So make sure you keep a close eye on it once you start fine-tuning.

Step 6
Moving on down, we have Bristle Length, which lets us adjust the distance between the bristle’s tip and the point where it meets the handle.
By definition, a bristle is a short, stiff coarse hair of filament from certain animals, usually pigs, used for making brushes. That being said, any setting that has the word “bristle” within its label will actually control features of the brush’s hair segments.
When adjusting the length of the bristle, you need to know that the greater the length is, the denser and wider the brush will end up being.

I’m going to increase the default value to 120%, which will give me a slightly greater length.

Step 7
Next, we have Bristle Density, which controls the number of bristles found within the brush’s tip and is calculated based on the brush Size and Bristle Length.

I’m going to go with a value of 20%, which will give me that nice transparent overlapping that watercolor paints are known for.

Step 8
We then have Bristle Thickness, which as the name suggests controls the thickness of the watercolor stroke’s composing bristles.

For our current example, I’m going to set the thickness to 20%, but feel free to go higher if you want to.

Step 9
The fifth option is Paint Opacity, and it controls the opacity level of the paint, which can vary from translucent to fully opaque.

Since I want the paint to be relatively subtle, I’m going to lower the default value to 64%.

Step 10
Finally, we have Stiffness, which controls the rigidity of the bristles when you’re doing a watercolor stroke. The lower the value you end up using, the more flexible the bristles will become, which will affect how the traced paint ends up looking.

Since I want the watercolor paintbrush to look and feel more flexible, I’m going to use a value of just 24%.

How to Use the Custom Watercolor Bristle Brush
Let’s see how to paint in Illustrator. We’ve just finished creating our custom watercolor bristle brush, but how do we actually put it to use to get a watercolor effect in Illustrator?
To use the brush, all you have to do is select it from within the Brushes panel, and then start drawing using the Paintbrush Tool (B).
Now, personally I’m not much of a painter myself, but if you add a graphics tablet and some patience to the mix, you can quickly take it up a level once you get used to how it handles.

You can easily adjust the color of the brush or brushstrokes by simply selecting them and then changing their Stroke color as you would normally do. That’s how you create a watercolor illustration!

You can also adjust the thickness of the watercolor strokes by opening up the Stroke panel and then simply lowering or increasing them depending on what you’re trying to achieve.

If you need to, you can always adjust the bristle brush by double-clicking on it from within the Brushes panel, and then simply carrying out the desired adjustments using the live preview, which will update all your brushstrokes once you hit OK.

3. How to Create a Custom Watercolor Brush Using a Scanned Image
This second method of creating a watercolor Illustrator brush is a little more elaborate, since we’ll be combining real-life, traditional painting methods with digital ones.
For a realistic watercolor illustration, you’ll need the following resources in order to get started:
- watercolor paints
- watercolor paper
- some paintbrushes
- a cup of water
- an image scanner or phone camera

Step 1
Start by putting a little bit of water on your paper using a clean brush. Then, quickly add some color, letting it spread as you drive the brush through the water. Give it a couple of goes, and once you feel you’ve got an interesting result, move on to the next step.

Step 2
Using either an image scanner or your phone’s camera, transfer the image to your computer, and then isolate the watercolor brush strokes using Photoshop or any other image editing tool that you have at hand.
Take your time, making sure to remove the white background, and then save it using a file format that supports transparency. Depending on the method used to import the brushstrokes, you can also adjust the resulting image by playing with its exposure level, brightness, etc.

Step 3
Next, we’re going to isolate each of the brushstroke segments and save each one as its own transparent image file. Once you’re done, go back into Illustrator and create a new document (Control-N), and then place the desired image inside it by going to File > Place, or by using the Shift-Control-P keyboard shortcut.

Step 4
Once we’ve placed the file within Illustrator, we need to rasterize it by heading over to Object > Rasterize, making sure to set the Background to Transparent from within the pop-up window.

Step 5
Next, we’re going to want to considerably resize the rasterized image so that we can turn it into a proper digital watercolor Ai brush.

Step 6
All we have to do now is open up the Brushes panel, and with the image selected, simply click on the New Brush button.

Step 7
A new pop-up window should instantly appear, giving you a list of five different types of brushes that you can create. Make sure you select Art Brush and then hit OK.

Step 8
A new Art Brush Options prompt will appear, allowing you to adjust some of its settings, including its name. All you have to do now is choose a Direction for your brush, and after you’ve made sure that the Stretch to Fit Stroke Length and Adjust corners and folds to prevent overlaps options are checked, simply click on OK.

How to Use the Custom Watercolor Scanned Brush
So we’ve gone through the process of taking real-life watercolor brush strokes and turning them into a digital brush, but how do we go about using it?
Well, it’s really simple. Just select it from within the Brushes panel and then use the Paintbrush Tool (B) to draw the desired brushstrokes. That’s all the trick in how to paint in Illustrator!

Unfortunately, since we’re using an image, we can’t change the colors of the watercolor paintbrush. On the other hand, if we need to change some of the other settings like its Direction, you can easily do that by double-clicking on it from within the Brushes panel and carrying them out from within the Art Brush Options window prompt.
4. How to Create a Custom Watercolor Brush Using the Image Trace Function
The third and last method is probably my favorite one since it gives us total control over our brush, as we are going to see in the following moments.
Step 1
As we did with the previous method, start by placing an image of the desired brushstroke in Illustrator and then quickly scaling it down to something smaller, making sure to Rasterize it afterwards (Object > Rasterize > Background > Transparent).

Step 2
Open up the Image Trace window (Window > Image Trace), and then set the Preset to High Fidelity Photo, making sure to lower the number of Colors, since depending on your scanned brushstroke, it can greatly affect your computer’s performance, due to the high number of Paths and Anchors that the software will end up producing.
If you really want to, you can expand the Advanced settings, where you have a few more options that allow you to control the number of Paths and Curves and the amount of Noise, but I’m just going to leave them as they are for this example.

Step 3
Once you’re ready, all you have to do is click on the Expand button found within the interface’s top bar, which will convert our image into a plethora of paths.

Step 4
Next, we need to remove all the white space surrounding our brush, by first clicking on the white space found inside the resulting trace’s bounding box, and then going to Select > Same > Fill Color and immediately pressing Delete.

Step 5
At this point, we can open up the Brushes panel and create a new brush, making sure to set its type to Art Brush.

Step 6
As soon as you hit OK, the Art Brush Options window prompt will appear. Here we’ll want to give the brush a custom name, and then change its Colorization Method to Tints and Shades so that we can change its color later on.
Leave the Key Color as the default, making sure that the Stretch to Fit Stroke Length and Adjust corners and folds to prevent overlaps options are checked. Then simply click OK.

How to Use the Traced Watercolor Brush
At this point, you might be wondering why we created a second brush using a scanned image. Well, if the second method didn’t offer us any versatility when it came to editing the color of our brush, this third one fixes the problem, opening up a world of possibilities in how to use a watercolor brush in the software.
To use the brush, you first have to set a color for your Stroke, and then simply follow the same process as before, where you select it from within the Brushes panel and then use the Paintbrush Tool (B) to draw the desired brushstrokes.

If you want to, you can easily change the color of the brush by giving its Stroke a new value, which will always produce an interesting effect, as you can see. Note that not all colors will work perfectly, so play around with them until you find those that do.

Great Job! You’re an Expert In Watercolor Ai Brushes!