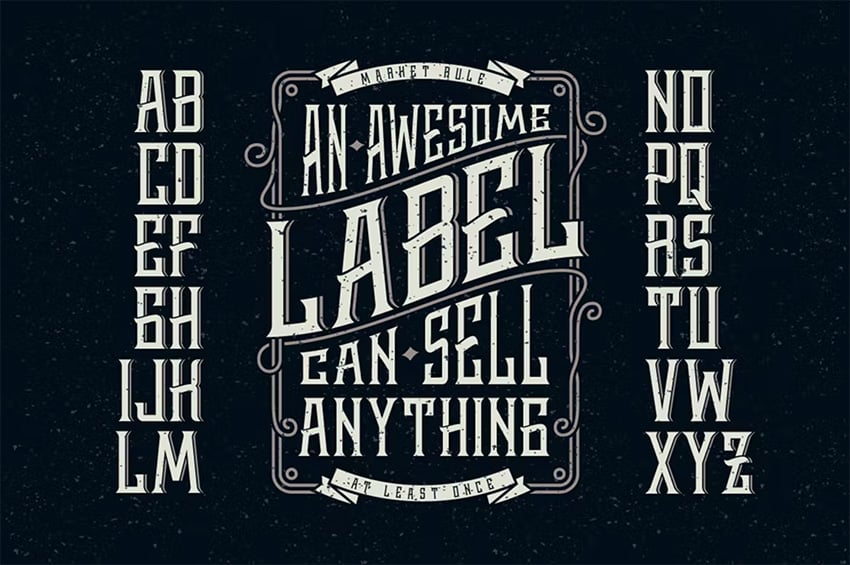
1. How to Prepare Your Label Document in InDesign
As we’ll be vectorizing the final result, you can in theory create the label to any size.
For ease of purpose here, however, if you match the page size settings described below, you can follow my font sizing exactly.
Step 1
Open up InDesign and head up to File > New > Document.
Deselect Facing Pages and set the page to a custom size of Width 16 in and Height 16 in. No need to worry about Margins or a Bleed for our purposes here, so go ahead and click OK.

Step 2
With the rulers visible (View > Show Rulers), drag a guide down from the top ruler, dropping it at Y position 8 in, marking the center point of the page.
Drag a second guide out from the left-hand ruler to 8 in too.

2. How to Build Up the Details of Your Label
Step 1
Select the Ellipse Tool (L) and drag roughly onto the center of the page, creating an oval shape.

Switch to the Type on a Path Tool (Shift-T) and click once on the top-left corner of the oval to transform it into a text path.
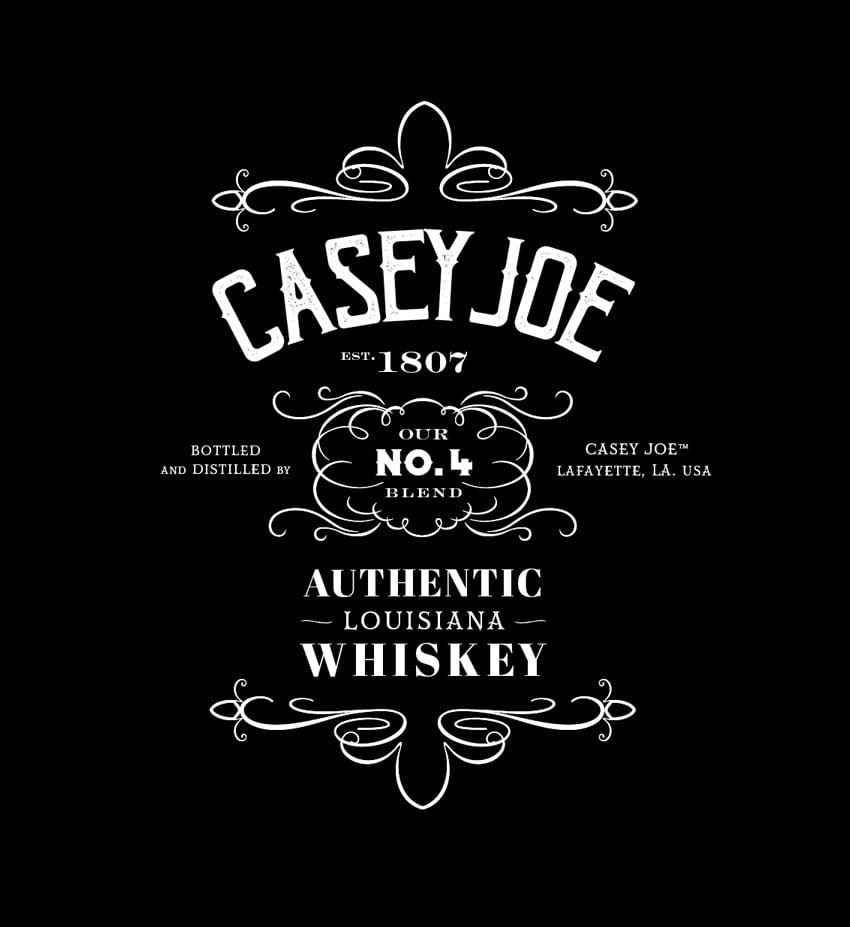
Type in the title of your whiskey, here ‘Casey Joe’, in uppercase letters.

Step 2
Highlight the text with your Type Tool cursor and, from either the Controls panel running along the top of the workspace or the Character panel (Window > Type & Tables > Character), set the Font to Bohem Press Regular and the Font Size to 124 pt.

We want the text to be nice and compact, and we can edit the kerning settings (which dictate the gap space between individual characters) to do so. Place your cursor between some of the individual letters which have overly generous gaps between them. Reduce the Kerning until the title appears more pulled together.


Step 3
Minimize your InDesign document for just a moment, and open the vector border set you downloaded earlier in Adobe Illustrator.
Scroll down the artboard until you find the pair of border elements pictured here.
Right-Click > Ungroup the pair of borders. Then drag your mouse across the elements that make up the top border and Right-Click > Group. Then head up to Edit > Copy.

Return to your InDesign document and Edit > Paste the border element onto the page. Expand the Stroke panel (Window > Stroke) and, with the border selected, increase the Weight of the stroke to 0.25 mm, to make the design a little bolder.

Step 4
Open the vector ribbon set in Illustrator. Right-Click > Ungroup the vector elements on the artboard, and delete the text from the center of the border sitting to the center-right of the page.
Then select the graphic elements making up this border and Right-Click > Group. Then Edit > Copy the border.

Back in InDesign, Edit > Paste the border onto the page. From the Swatches panel (Window > Color > Swatches), adjust the Fill Color to [Black]. Hold Shift while you resize the border, positioning it just slightly lower than the center-point of the page.
From the Stroke panel, set the weight to 0.25 pt.

Step 5
Take the Type Tool (T) and drag onto the page, creating a text frame inside the top part of the ornate border. Type in ‘OUR’ and set the Font to Engravers LT Std Bold Face, Size 32 pt and decrease the Tracking (space between all the characters) to -20.
From the Paragraph panel (Window > Type & Tables > Paragraph), set the text to Align Center.

Copy and Paste the text frame, moving it to sit towards the bottom of the border.
Adjust the text to read ‘BLEND’ and decrease the Font Size to 26 pt. Increase the Tracking to 80.

Create another text frame between the ‘OUR’ and ‘BLEND’ frames, typing in ‘NO. 4’. Set the Font to Portico, choosing Diablo for the weight, and the Font Size to 44 pt.

Step 6
Fill in the gap above the ornate border with another text frame, listing a year and setting the Font to Engravers LT Std Bold Face, Size 50 pt, Tracking -60.

Edit > Copy, Edit > Paste the text frame, moving the copy to the top-left corner of the year. Edit the text to read ‘EST.’ and edit the Font Size to 21 pt and Tracking to -20.

Step 7
Create a new text frame below the border, typing in ‘AUTHENTIC’ and setting the Font to Abril Fatface, Size 45 pt, Tracking 60. Make sure the text is set to Align Center too.

Copy and Paste the text frame, moving it below the original with a gap in-between. Edit the text to ‘WHISKEY’ and increase the Font Size to 54 pt and Tracking to 120.

Create a new text frame between ‘AUTHENTIC’ and ‘WHISKEY’ and write ‘LOUISIANA’. Set the Font to Mr. Darcy Regular, Size 33 pt, Tracking 80 and text to Align Center.

Step 8
Head back to the vector ribbons set in Illustrator, and scroll down to the bottom-right corner of the artboard and the simple border sitting there. Ungroup the elements and then select the central curved line at the bottom of the border, and Edit > Copy.

Back in your InDesign document, Edit > Paste to drop the line onto the page. Adjust the Color to [Black] and rescale and position it to the left side of ‘LOUISIANA’. Increase the Weight of the Stroke to 0.15 mm.

Copy and Paste the line, and Right-Click > Flip Horizontal, moving the copy over to a mirrored position to the right side of ‘LOUISIANA’.


Step 9
Scroll up to the top of your label design and select the border element at the top, and then Edit > Copy, Edit > Paste. Select the copy and Right-Click > Transform > Flip Vertical.

Move this down to the bottom of the layout, sitting it centrally underneath the ‘WHISKEY’ text frame.

Step 10
The custom Jack Daniel’s label has really taken shape—great job! Looking at the layout as a whole, it’s looking a little stretched out, so we can make the label appear a bit squarer by adding more text strategically.
Take the Type Tool (T) and create a small text frame to the left of the central ornate border. Type in ‘bottled and distilled by’ in uppercase letters, splitting the line after ‘bottled’. Set the text to Align Center, Font to Mr. Darcy, Size 18 pt and Tracking to 40.

Then highlight ‘AND’ and ‘BY’ individually and reduce the Font Size to 14 pt.

Select the text frame and Copy and Paste it, moving the copy over to the right side of the label, using the guide to align it with the original text frame.
Here you can type up the name of the distillery and the location.
To add a trademark symbol to the distillery name, go to Window > Type & Tables > Glyphs and double-click on the appropriate symbol in the panel to insert it into the text frame.


The InDesign artwork for your whiskey label is finished—awesome work!
Now all that’s left to do is to convert it to vector format, so it can be used as a scaleable logo design. Read on to find out how…
3. How to Vectorize Your Label Design
Step 1
Make sure to File > Save your InDesign artwork, and then drag your mouse across all the elements sitting on the page and Edit > Copy.

Go to Illustrator and head up to File > New. Set the Width and Height to 16 in to create a square canvas to match the size of your InDesign document. Click OK.

Edit > Paste to drop the label design onto your Illustrator artboard. Center it on the page again if necessary.

Step 2
Select individual parts of the label design which seem to now be merged together and Right-Click > Release Clipping Mask, until everything is separated.

You will need to outline the text on the design to make it scaleable. To do that, select individual text elements and go to Type > Create Outlines.


Step 3
To really make your label design pop, we can set it against a dark background.
Expand the Layers panel (Window > Layers) and click on the Create New Layer button at the bottom of the panel. Drag this layer to sit below the label artwork layer and rename it Background.

With the label layer locked, use the Rectangle Tool (M) to create a square across the whole artboard. Set the Fill to Black.

Step 4
Lock the Background layer and switch off the visibility for now. Unlock the label layer above. Select the border elements on your layout and adjust their Fill and Stroke color to White.


Then select all the outlined text elements and switch their Fill color to White too.